Guide to Building a Microservice with Node.js
- Gunashree RS
- Sep 12, 2024
- 7 min read
In the rapidly evolving world of software development, microservices have become a go-to architectural style for creating scalable, maintainable, and efficient applications. As businesses grow and user demands become more complex, monolithic applications struggle to keep up. Enter microservices—a solution designed to split large applications into smaller, independent services that work together to form a cohesive system.
If you're new to microservices or looking to implement them effectively, this guide will walk you through building a microservice from scratch using Node.js and Seneca. By the end, you'll understand the basic principles of microservices, how to set up your first microservice, and the tools you'll need to get started.
Introduction: What Are Microservices?
Microservices are an architectural style that structures an application as a collection of small, loosely coupled services. Each service is designed to perform a specific business function and communicates with other services through lightweight protocols such as HTTP/REST. This approach contrasts with traditional monolithic architectures, where all functionalities are tightly interwoven into a single codebase.

Why Choose Microservices?
Scalability: Microservices can scale independently. If one service needs more resources due to higher traffic, you can scale it without affecting other services.
Flexibility: Different microservices can be built using different technologies, allowing teams to use the best tool for each job.
Fault Isolation: If one microservice fails, it doesn’t bring down the entire system.
Faster Development Cycles: Smaller codebases are easier to maintain and update, leading to quicker feature releases.
Now that we understand what microservices are and why they’re useful, let’s dive into how you can build a simple microservice from scratch.
1. Setting the Foundation: Tools You’ll Need
Before you start building microservices, you need to choose the right tools for the job. In this guide, we’ll use:
Node.js: A JavaScript runtime built on Chrome's V8 engine, designed for scalable network applications. It’s a popular choice for building microservices because of its asynchronous, event-driven nature.
Seneca: A microservices framework built on top of Node.js. It simplifies the process of creating microservices by handling tasks such as service discovery and message passing.
Other Tools You’ll Need:
Postman: To test your REST APIs.
JSON: To format and transfer data between services.
npm: Node’s package manager, used for installing necessary packages like Seneca.
2. Understanding JSON in Microservices
JSON (JavaScript Object Notation) is the format of choice for transferring data in microservices. Whether you’re sending requests or receiving responses, the data will most likely be in JSON format. Here’s why JSON is ideal for microservices:
Simplicity: JSON is easy to read and write. It uses key/value pairs, making it straightforward for developers to understand and implement.
Lightweight: Unlike XML, JSON avoids unnecessary tags, reducing data payload size, which is crucial for maintaining efficiency in microservice architectures.
Scalable: Its strict format ensures compatibility across different services, making it easy to scale as your application grows.
For those new to JSON, you can find excellent tutorials on W3Schools or TutorialsPoint to get started.
3. REST vs. SOAP in Microservices
When building microservices, two popular protocols are used for communication: REST and SOAP. Most modern microservices use REST due to its lightweight nature and stateless communication.
Advantages of REST for Microservices:
Stateless Communication: REST operates statelessly, meaning each request from a client contains all the information needed to process the request.
Caching: REST APIs support caching, reducing server load and improving response times.
Decoupled Architecture: REST decouples consumers (clients) from producers (servers), making microservices more modular and flexible.
Uniform Interface: REST uses standard HTTP methods (GET, POST, PUT, DELETE), making it easier to implement and test.
While SOAP offers features like built-in error handling and security, its complexity and bandwidth overhead make it less ideal for lightweight microservices.
4. Building a Microservice with Node.js and Seneca
To demonstrate how to build a basic microservice, we’ll use Node.js and Seneca. The example will show how to create a microservice that responds to simple requests using JSON format.
Step 1: Setting Up Your Project
First, create a new directory for your project. In your terminal, navigate to your desired folder and type:
bash
mkdir my-microservice
cd my-microservice
Now, initialize a new Node.js project by typing:
bash
npm init -yThis will create a package.json file, which will manage your project dependencies.
Step 2: Install Required Packages
Next, install the necessary packages. You’ll need Seneca to create the microservice:
bash
npm install senecaStep 3: Writing the Microservice Code
Now that we have the setup, create a new file called service.js and add the following code:
javascript
require('seneca')()
  .add({ say: "hello" }, function(message, done) {
    done(null, { message: 'hello' });
  })
  .listen();
What’s Happening Here?
require('seneca')(): This loads the Seneca framework into memory.
.add({ say: "hello" }, function(message, done)): We define a match pattern that listens for the action { say: "hello" }. When it detects this, it triggers a function that returns a JSON response { message: 'hello' }.
.listen(): This tells Seneca to listen on the default port (10101) for incoming requests.
Step 4: Running the Microservice
In your terminal, run the microservice by typing:
bash
node service.jsYou should see an output that indicates the microservice is listening for requests. To test it, open a browser or Postman and enter the following URL:
bash
You should receive a JSON response like this:
json
{
  "message": "hello"
}
If you send an unsupported request, such as:
bash
You’ll see an error in the console indicating that no match was found for the { say: 'goodbye' } action.
5. Testing and Debugging Your Microservice
Testing is an integral part of building microservices. As the number of microservices grows, it’s important to ensure that they work correctly in isolation and when integrated with other services.
Testing with Postman
You can use Postman to send various HTTP requests to your microservice and test its responses. Make sure to:
Test various endpoints: Try different actions and observe the JSON responses.
Check error handling: Send invalid requests and check how the service handles them.
Logging and Debugging
While running the microservice, you can observe logs in the console. Seneca provides detailed stack traces, which are helpful for debugging any issues in your microservice.
6. Scaling Your Microservice
A single microservice is just the beginning. As your application grows, you’ll need to scale your microservices. Here are a few strategies:
Service Discovery
As the number of microservices grows, you’ll need a way for services to find and communicate with each other. You can use tools like Consul or Etcd for service discovery, which allows services to register themselves and find other services dynamically.
Load Balancing
To ensure that requests are distributed evenly across instances of your microservices, use a load balancer like NGINX or a cloud provider's built-in load balancing services. This improves fault tolerance and performance.
Containerization with Docker
You can containerize your microservices using Docker. Each microservice runs in its own container, which makes it easier to deploy, scale, and maintain. With Kubernetes, you can orchestrate and manage thousands of containers, providing features like self-healing, scaling, and load balancing.
7. Best Practices for Building Microservices
Single Responsibility Principle
Each microservice should focus on one specific business capability. This makes the system more modular, easier to maintain, and more scalable.
Decentralized Data Management
Each microservice should manage its own data. Instead of having a single monolithic database, microservices typically use decentralized storage, ensuring that services remain loosely coupled.
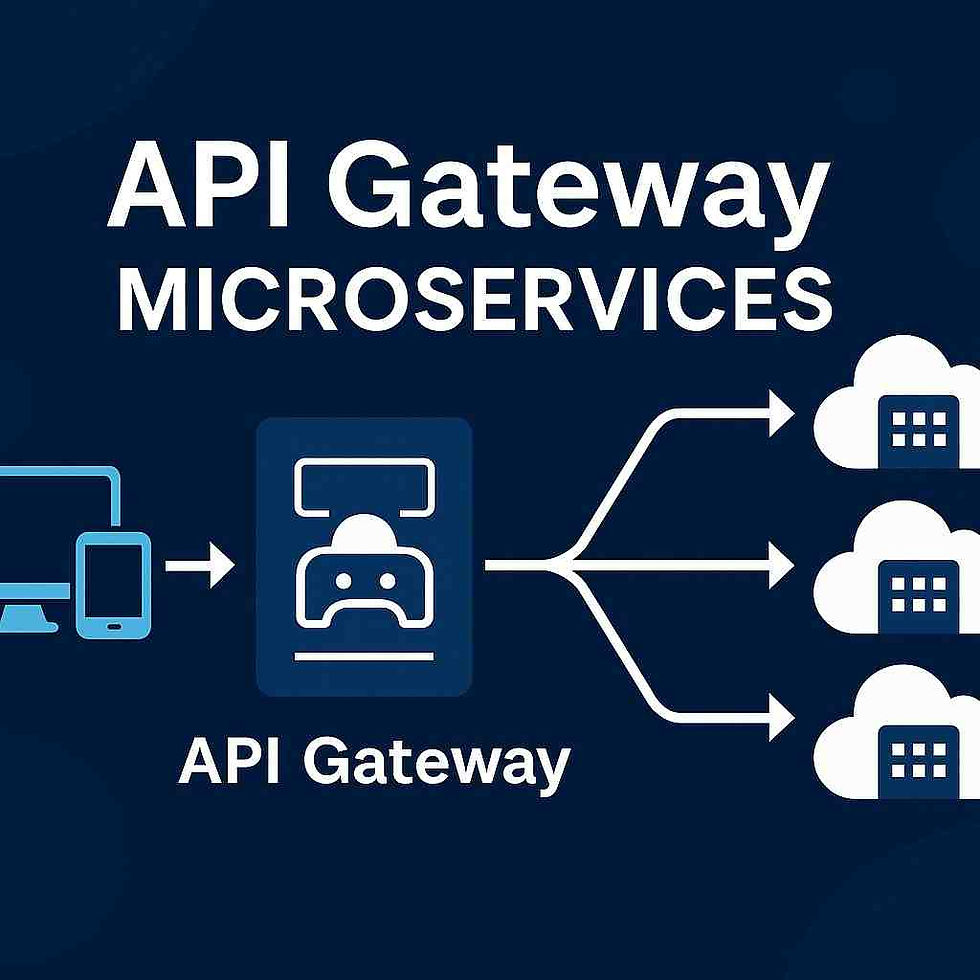
Implement API Gateways
As the number of microservices grows, an API gateway can serve as a single entry point for clients. It routes requests to the appropriate microservice, handles security, and improves performance through caching.
Security Considerations
Microservices communicate over the network, making them vulnerable to attacks. Implement strong authentication, authorization, and encryption protocols to protect your services.
Conclusion
Building microservices with Node.js and Seneca can significantly enhance the scalability and maintainability of your applications. By following the steps outlined in this guide, you can create a basic microservice that handles requests efficiently and responds with JSON data. As your application grows, consider scaling your microservices through service discovery, load balancing, and containerization.
Emphasize best practices like focusing on single responsibilities and implementing API gateways to ensure your microservice architecture remains robust and secure. With Node.js and Seneca, you're well-equipped to handle the demands of modern software development and deliver high-performing applications.
Key Takeaways
Microservices Architecture: Microservices split large applications into smaller, manageable services that communicate through lightweight protocols.
Node.js: A popular choice for building microservices due to its asynchronous, event-driven capabilities.
Seneca: A framework that simplifies microservice creation by managing service discovery and message passing.
JSON: The preferred format for data transfer in microservices due to its simplicity and efficiency.
Scaling Strategies: Use service discovery tools, load balancers, and containerization to scale and manage your microservices effectively.
Best Practices: Focus on single responsibility, decentralized data management, and implement API gateways for enhanced performance and security.
FAQs
1. What is Seneca and why should I use it for microservices?Seneca is a microservices framework for Node.js that simplifies the development of microservices by handling service discovery, messaging, and other common tasks. It allows developers to focus on the business logic rather than infrastructure concerns.
2. How does JSON compare to XML in microservices?JSON is preferred over XML for microservices because it is more lightweight, easier to read and write, and has a simpler structure. This leads to more efficient data transfer and better performance.
3. Can I use other programming languages for building microservices?Yes, microservices can be built using various programming languages. Node.js is popular for its non-blocking I/O and scalability, but other languages like Python, Java, and Go are also commonly used based on specific project needs.
4. What are the benefits of using a load balancer with microservices?A load balancer distributes incoming requests evenly across multiple instances of your microservices. This improves performance, enhances fault tolerance, and ensures high availability by preventing any single service instance from becoming a bottleneck.
5. How can I ensure security in my microservices architecture?To secure microservices, implement robust authentication and authorization mechanisms, encrypt data in transit, and regularly update your services to patch vulnerabilities. Using API gateways can also help manage and enforce security policies.


Comments